
Implementing your company’s logo and color scheme is a great way to strengthen your brand through video.
In this article, you’ll learn:
- What is the Brand Hub
- Recommended Logo Format
- How to Add a Logo
- Brand Hub Color Palette
- Adding an Intro/Outro
What is the Brand Hub?
The brand hub streamlines the task of aligning both your content and that of your team, ensuring it seamlessly resonates with your brand through a few simple clicks. You can access the brand hub via the Hour One dashboard and selecting the ‘Brand Hub’ tab on the left menu bar.
From here, you can name the kit, upload your logo, add your company colors, and even add your standardized intro/outro.
This is available exclusively for the Business plan.
-3.png?width=688&height=335&name=mceclip0%20(2)-3.png)
Selecting a Logo
Logos must first be saved on your device before they can be uploaded to the editor. Hour One recommends the following:
Format: Logo files in png (ideal for transparent logos), or jpg.
File size: 30Mb (max)
Dimensions: Logos should be at least 200x200 pixels (more pixels = higher quality).
Uploading Your Logo
-
Within Brand Hub
Under the ‘Logo’ section, select the ‘Add Logo’ icon and upload your logo media from the media library.
-2.png?width=688&height=531&name=mceclip2%20(1)-2.png)
-
Within the Editor
Click on the ’Brand’ icon on the right-hand menu bar, then ’Use Brand Kit’ to automatically upload the logo that was added to the Brand Hub. If you wish to use a different logo, simply select ‘Insert Logo’ to upload an image file manually from the media library.
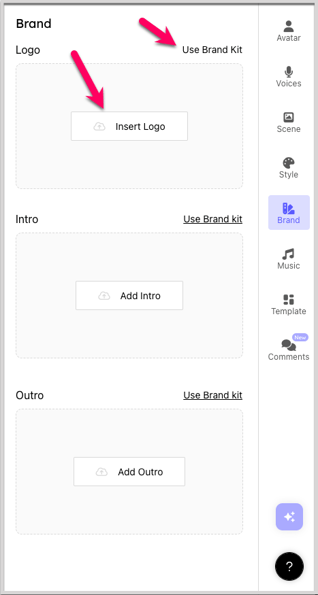
Your logo should now be visible in the bottom right-hand corner of each scene.
Brand Hub Color Palette
-
Within Brand Hub
Select the ‘Add Brand Style’ button. Once selected, a window will appear allowing you to change 5 colors in the palette to your custom colors (you should prepare the color codes for your branding before entering this stage).
-2.png?width=688&height=442&name=mceclip0%20(3)-2.png)
Click on a color bubble at the top, and enter a new 6-digit color code below or click on the color spectrum/hues to change it manually (less recommended if you’re working with existing branding). Once finished, select ‘Apply’.
-3.png?width=536&height=457&name=mceclip1%20(1)-3.png)
Note: A Brand color palette created within the Brand hub is marked with a special icon and can be changed only from the Brand hub (and not from the Style menu, like the other palettes)
-
Within the Editor
Click on the first palette that appears within the list and contains the brand hub icon to quickly add the colors selected from the Brand hub.
-2.png?width=468&height=551&name=mceclip2%20(2)-2.png)
Important: This will apply the color changes throughout the entire draft, not just to the highlighted scene. To edit each layout color individually, this will need to be done within the ‘Content’ subtab of the ‘Scene’ tab. Read more here.
Adding an Intro/Outro
-
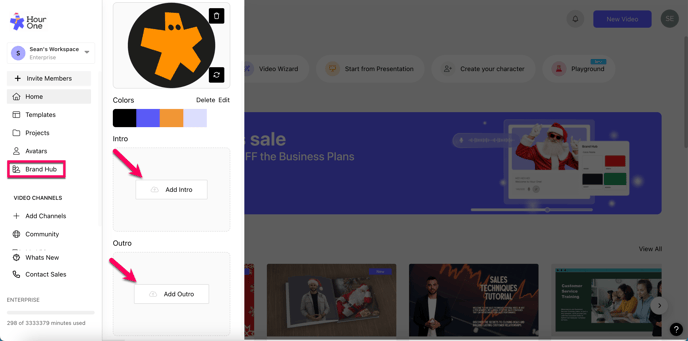
Within the Brand Hub
To add an intro and/or outro within the Brand Hub, select the respective icon and upload a video straight from the media library.
-
Within the Editor
Click on the ’Brand’ icon on the right-hand menu bar, then scroll down to the Intro/Outro section, and click ’Use Brand Kit’ to automatically upload the intro/outro video that was added to the Brand Hub. If you wish to use a different intro/outro video, simply select ‘Add Intro’ or 'Add Outro' to manually upload an image file from the media library.
.png?width=688&height=342&name=mceclip8%20(1).png)
Read our article to learn more about our intro/outro feature.
Need any help with the Brand Hub feature? Send us a message.